Earthway 1001-B Precision Garden Seeder User Manual

Browse online or download User Manual for Gardening equipment Earthway 1001-B Precision Garden Seeder. Earthway 1001-B Precision Garden Seeder User Manual

  • Download
  • Add to my manuals
  • Print
  • Page
    / 5
  • Table of contents
  • BOOKMARKS
  • Rated. / 5. Based on customer reviews
Page view 0
1001-B PRECISION GARDEN SEEDER®
ASSEMBLY and OPERATING INSTRUCTIONS
EarthWay
R
EarthWay
R
PRECISION GARDEN SEEDER ~ Assembly
Model 1001-B (Refer to Figure 1, Page 3 for illustration)
REAR WHEEL
Lower kick stand at front to hold planter upright.
Remove nut, bolt, and axle (22, 18, & 25) from frame.
Insert axle through rear wheel (17), place between frame, and line up with holes in end of frame.
Reinstall bolt and nut (18 & 22), and tighten.
Congratulations on the purchase of this new 1001-B Earthway Precision Garden Seeder. Please contact us if you have any
difculty with assembly or operation of this product. We can be reached via the telephone at 800-294-0671 or 574-848-7491
Monday - Friday 8:30am ~ 4:00pm or visit us online at www.earthway.com The 1001-B comes with lifetime technical
support, email us at techsupport@earthway.com.
HELPFUL HINTS: READ THE DIRECTIONS BEFORE ASSEMBLY
5 This seeder comes partially assembled, requiring you to install the wheels, handle assembly and row marker.
5 Assembly time is approximately 15 minutes with basic hand tools.
5 Clean and dry your seeder thoroughly after each use.
HANDLE
Remove nuts and bolts from Plastic Bag. (These are special lock nuts. A wrench will be required to
remove and install them).
Bolt handle (8) in place using bolt & nut (13 & 14) as shown in Figure 1, Page 3 for illustration.
Install the Row Marker Retainer Clip (10) from the front to the back and press into place in the
holes on the handle.
ROW MARKER
Place row marker shaft (1) in front of row marker bracket and line up holes.
Insert clevis pin (7) through row marker shaft (1) and row marker bracket, and
insert hair pin clip (6) through clevis pin. When not in use, secure the row marker
shaft to the New Row Marker Retainer Clip (10) to hold in place.
A cord may be tied to the handle bracket (24) and row marker shaft (1) for
lowering and raising the row marker.
E
a
r
t
h
W
ay
R
PRECISION GARDEN SEEDER
®
MODEL 1001-B
1-2014 Pt. #52101
Page view 0
1 2 3 4 5

Summary of Contents

Page 1 - EarthWay

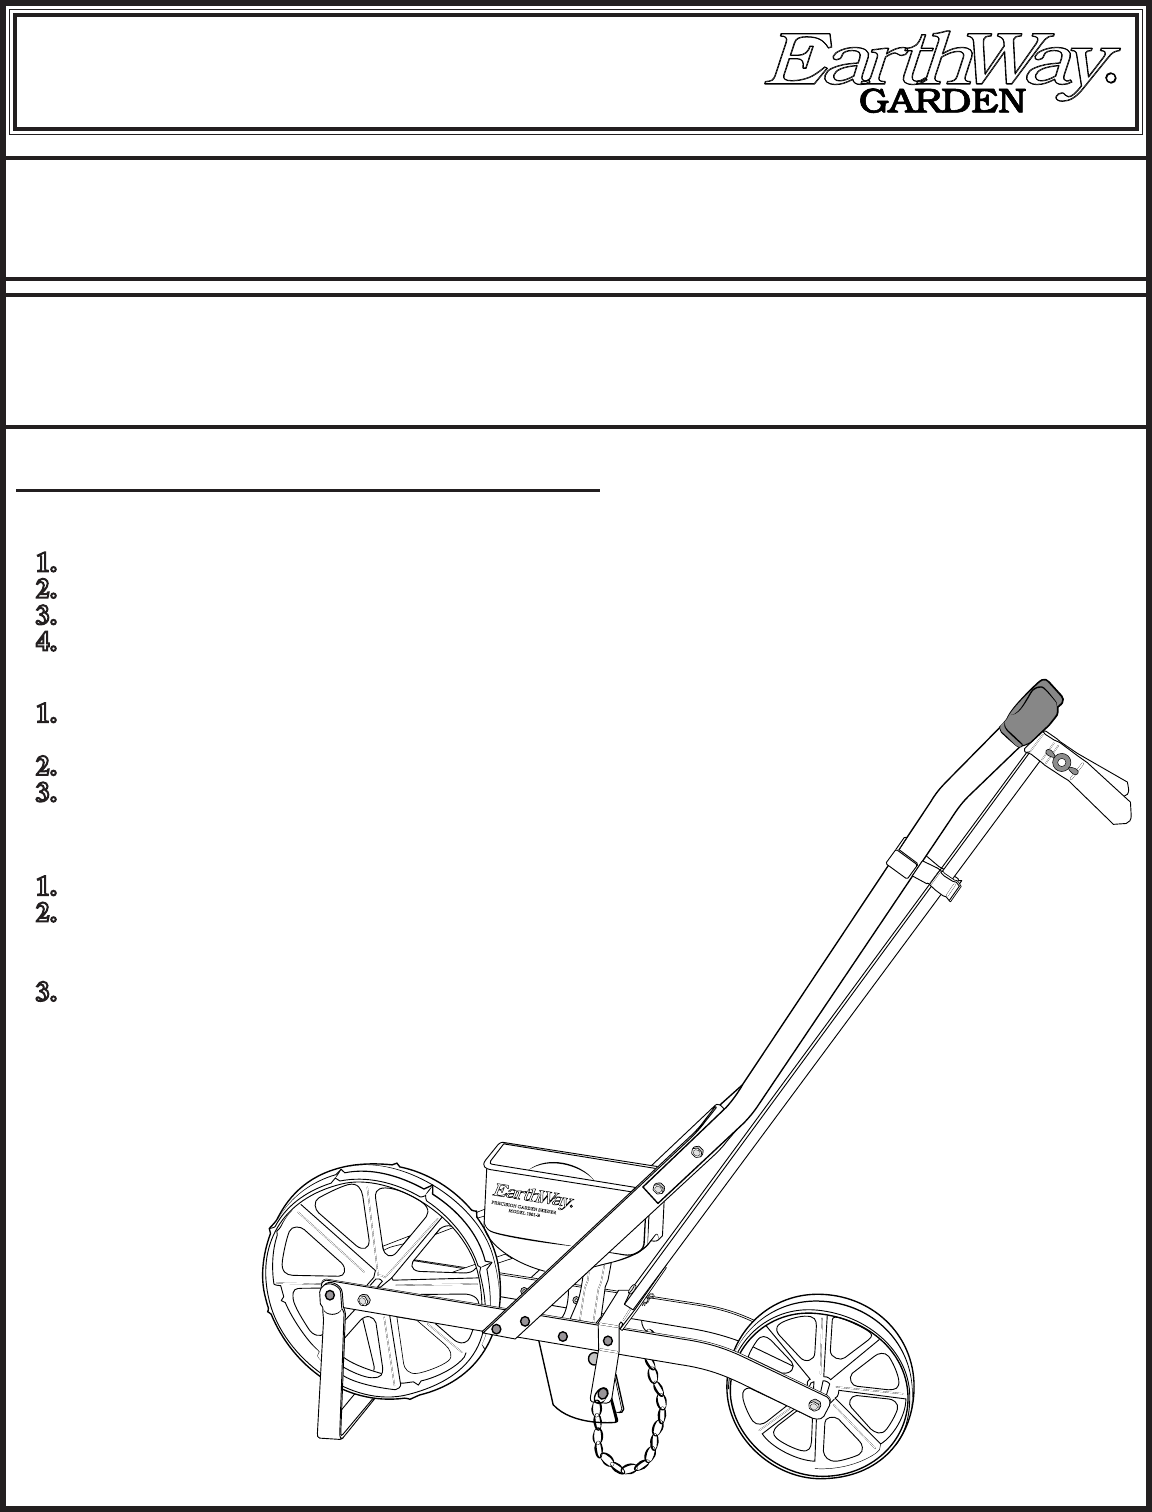
1001-B PRECISION GARDEN SEEDER®ASSEMBLY and OPERATING INSTRUCTIONSEarthWayREarthWayRPRECISION GARDEN SEEDER ~ AssemblyModel 1001-B (Refer to Figure 1,

Page 2

OPERATION (Refer to Figure 1, Page 3 for illustration)You will nd one seed plate in place in the hopper, the rest in the box. A. To remove the plate

Page 3 - Figure 1

Figure 11013 & 14Kick Stand2118, 22, & 251727Seed Hopper11 & 1216Row Marker BracketEarthWayRPRECISION GARDEN SEEDER®MODEL 1001-B76

Page 4 - Seed Plate Guide

EarthWayRFERT-A-PLY® Applicator - Side Dresser Model No. 1500PRODUCTS, INC., Bristol, Indiana1500 side-dress fertilizer attachment ~ optional accessor

Page 5 - 1001-B Parts List

1001-B Parts ListKey Part Description Key Part Description Part Description1 22606 ROW MARKER SHAFT (1001-B) 18 31102 5/16-18 X 4 1/4" HHCS ZINC

Comments to this Manuals

No comments